New life for the electronics of our boat
Greetings sailors,
Today we are going to reuse and modernize all the electronics of our boat thanks to our Rapsberry with Openplotter, interconnecting NMEA 0183 and Seatalk devices to be able to access their data from any device (Tablet, Mobile, Computer, Navionics, OpenCPN) and anywhere. And all thanks to connecting it with our Raspberry Pi with OpenPlotter. A world of possibilities to rejuvenate the electronics of our boat and make the most of it with very cheap and simple solutions.
Motivation
And why all this? Well, I don’t know what your case will be like, but in my case, when I bought the boat, I already had a certain amount of electronics, which I am sure was very good and very expensive in its day. , but that is becoming obsolete at a huge rate.
And, of course, each of these devices spoke and had different communications systems: The probe, Navico’s proprietary CAN BUS; the plotter, NMEA 0183; the wind equipment and the SeaTalk autopilot, and my Raspberry Pi that speaks all kinds of IP protocols and that allows us to connect via WiFi with any of our mobiles, tablets, computers, etc.
Well, our goal today is to interconnect these systems so that all the information is centralized in our rapsberry and we can access it, from anywhere on the boat, from the beach or even from home.
Shopping
And to do all this, what are we going to need:
The first thing, having seen the post about installing our Rapsberry Pi. If we have it with a Wi-Fi internet connection, as we indicated in our post about having Wi-Fi on the boat, better than ever, because it will allow us to see everything from a mobile, tablet, computer or even from home. If not, it is also valid, because we can see it from the Raspberry screen.
Now, to connect everything, then cables. My recommendation for data cables .. Well, UTP network cable, of those to connect computers to the internet that are standard, cheap and with a single cable you have 8 wires that give you to connect many things. In general we will need:
✅ RS232 adapters to connect NMEA equipment:
🔵 On AliExpress 2 for about 4 euros: https://s.click.aliexpress.com/e/_AXLMoU
🔵 On Amazon 1 for 7 euros: https://amzn.to/2VO6hWD
✅ Direct Seatalk to USB Adapter:
🔵 In your own store about $ 45: http://www.yakbitz.com/ST1toUSB1.aspx
✅ And to make your own Seatalk adapter for the Raspberry much cheaper:
🔵 12V Optocoupler for 2 euros: https://s.click.aliexpress.com/e/_AFEi0y
🔵 4.7K resistors for another 2 euros: https://s.click.aliexpress.com/e/_A9aNRQ
🔵 Small cables to connect to the RPi «male-female» 1.5 Euros: https://s.click.aliexpress.com/e/_AAO7Ek
✅ 8-wire UTP cable:
🔵 On AliExpress https://s.click.aliexpress.com/e/_9xdkEY
🔵 On Amazon https://amzn.to/3lumzMZ
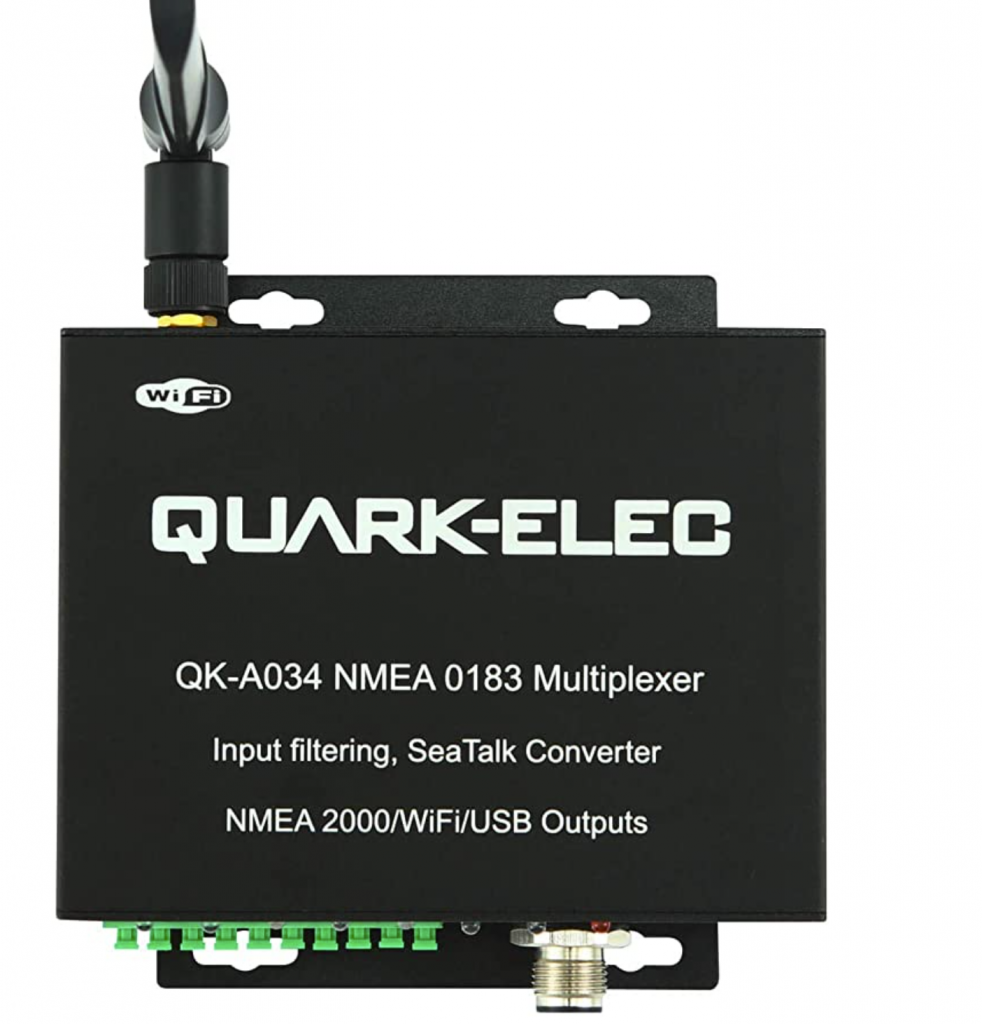
✅ And if you feel very clumsy and want a solution already made in an all-in-one plan, you have solutions for 230 euros like this:
🔵 QK-A034 Bidirectional WiFi multiplexer to NMEA 2000 Gateway (with SeaTalk converter (input) and NMEA 0183 input options) https://amzn.to/3EnGx4F
With this, some tools and electrical tape, we will have everything we need to make our assembly.
Mounting
It involves passing a cable from the NMEA and Seatalk connectors of our ship’s electronics, to the place where we have the Raspberry installed. In principle we will need two wires for the SeaTalk (as it is a communication bus with a connection we cover all our devices), and two or 4 wires for each NMEA 0183 device (depending on whether we only want to read data or also pass data to it). In my case, I have passed an 8-wire UTP cable from the blog to the switch panel where I have the Raspberry and with that I have enough cables for everything.
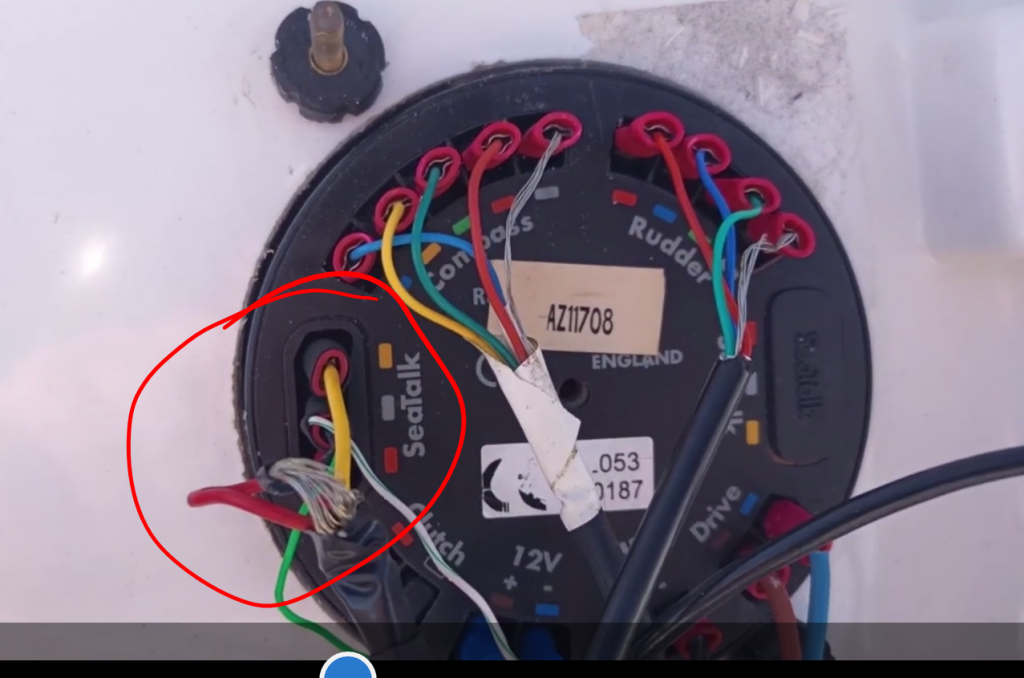
We are going to connect two of the wires to the SeaTalk to receive all the data from the wind equipment and the autopilot, we are going to use the green pair to connect to the green and yellow cables of the SeaTalk, which are the data cables. And at the other end we will connect these to the input of our optocoupler.We are going to connect two of the wires to the SeaTalk to receive all the data from the wind equipment and the autopilot, we are going to use the green pair to connect to the green and yellow cables of the SeaTalk, which are the data cables. And at the other end we will connect these to the input of our optocoupler.

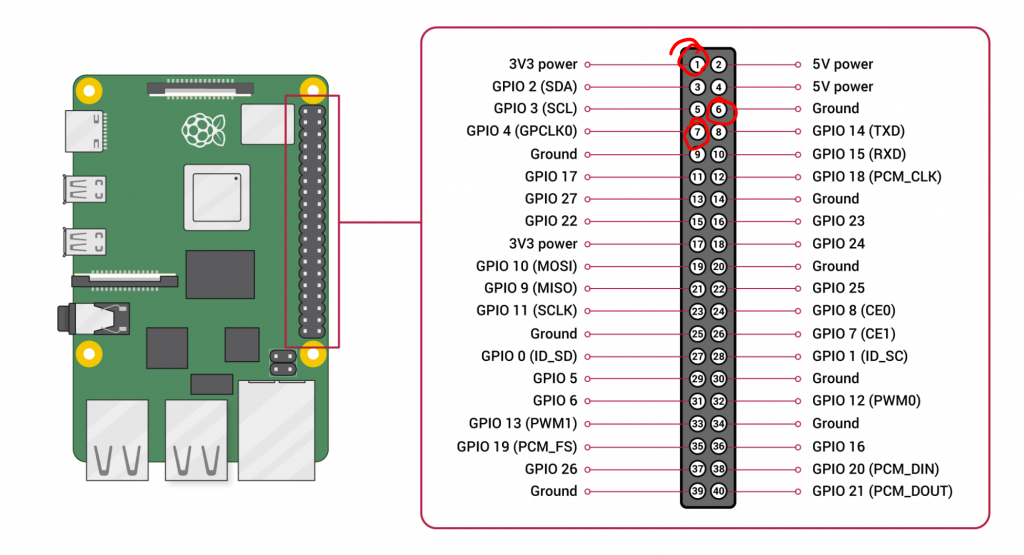
Finally, we will connect the other three pins of the optocoupler to the 3.3V pins (pin 1 for example), the GPIO 4 (pin 7) and GND (pin 6 for example) of our Rapsberry.
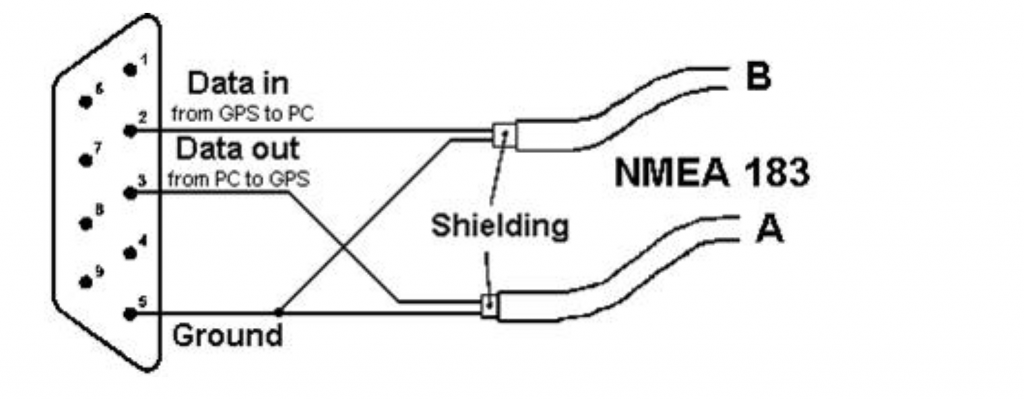
As for NMEA, we are going to see how to connect the most complete plotter:
We have NMEA input and output, so we will use the blue pair for the NMEA input of our plotter and the brown pair for the output of our plotter, both of which will end up connected to the pins of our second RS232 adapter, see diagram.
We will only need to connect the USB to the Raspberry, but we will do that during the configuration.
Remotely control our raspberry
In order to work more comfortably with the Raspberry, we are going to see two techniques to manage it remotely from any tablet, computer or mobile. The first designed for when we are connected to the same WiFi as it and the second for when we have it connected to the internet and we are far away.
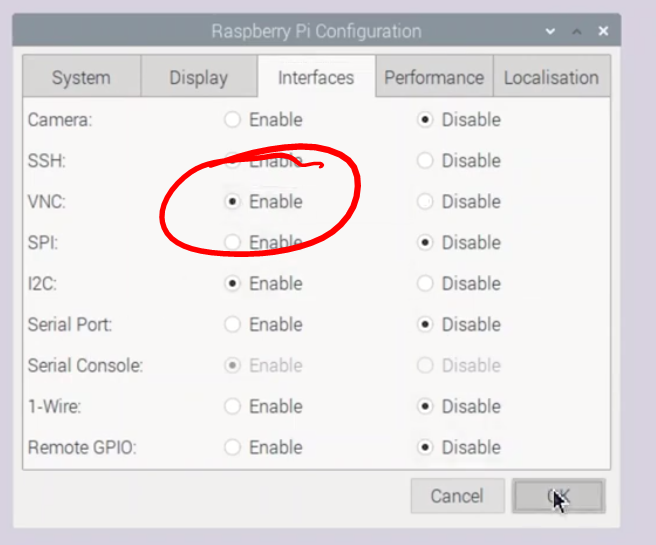
If our Rapsberry has wifi, but not internet, then we can do it when we are on the ship itself: It is as simple as enabling the VNC service in the Raspberry configuration. We simply go to the configuration, interfaces and enable the one that says VNC.
To connect from any device we can download the VNC client for that device, for example VNC Viewer and put the IP address of the Raspberry that we see in the control panel of the VNC server.
If we follow the advice in my episode 2, and also have the boat connected to the internet, we can do the same from anywhere in the world.
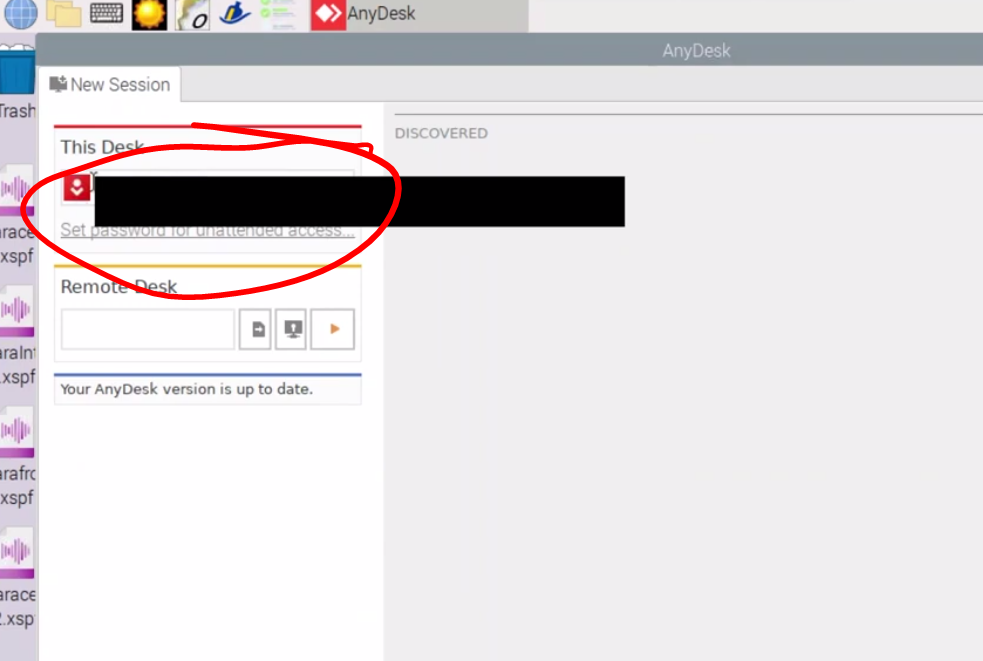
Easy too: we install the AnyDesk server on the raspberry. which is as simple as downloading the corresponding DEB file from the AnyDesk website and double-clicking on it (more details in the video).
The operation of AnyDesk is very simple, we will not have to open any port or anything, it connects to a server on the internet and through the unique identifier that it gives us and the password, we can manage the Raspberry from any place and device that has installed the AnyDesk, and all free, for private use.
With this, we can now see the Raspberry from anywhere and continue with the configuration steps of our SeaTalk and NMEA interfaces
Setting it up
The configuration of all this is quite simple, for the NMEA 0183 very easy:
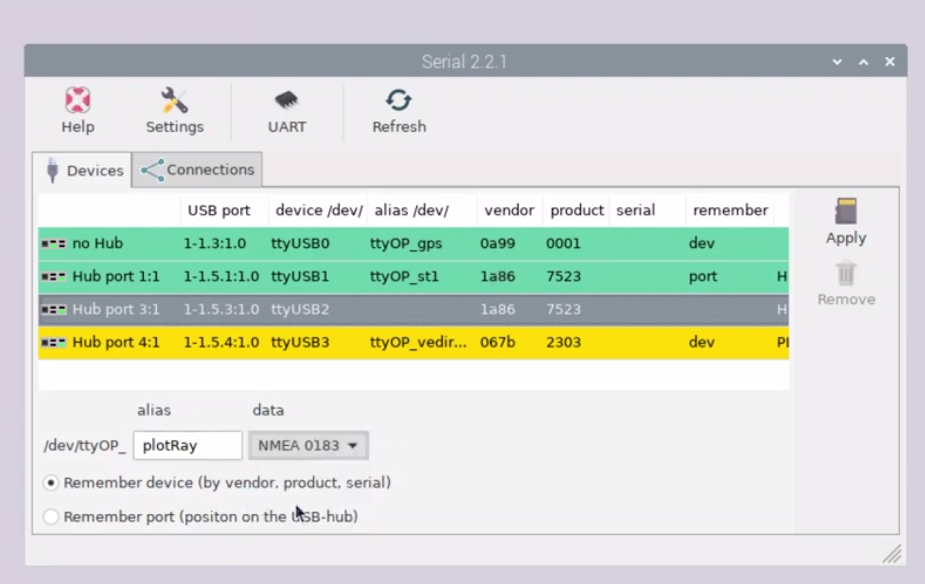
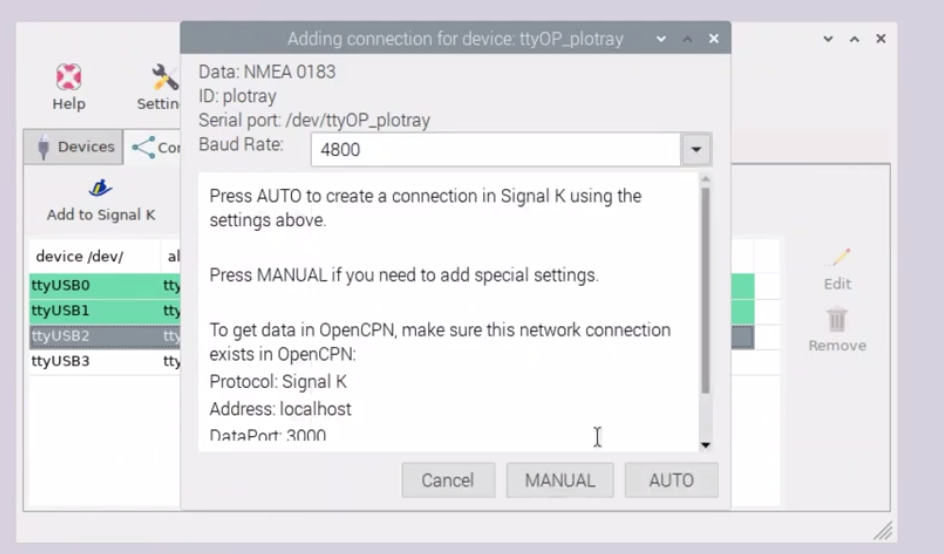
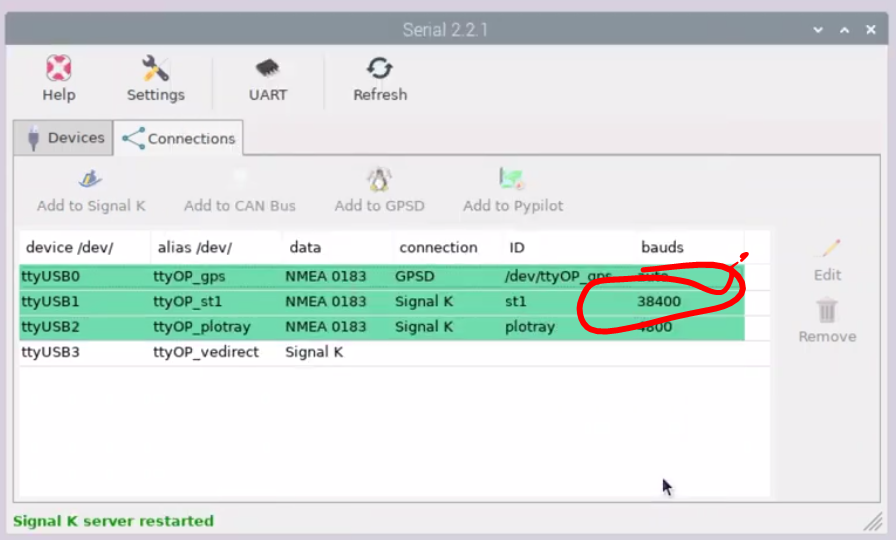
We go to the OpenPlotter Serial menu, in devices the devices that we have connected will appear, we connect the USB of our RS232 adapter to the Raspberry, we will see that one more appears in the list when we refresh, we click on it, we assign an alias, So that it always remembers you and we can easily distinguish it, we choose NMEA0183, click on Apply and go to connections, we select it, we choose the standard speed of the NMEA0183 which is 4800 bps and we give it to Add to Signal K. And that’s it. We could repeat this for all the other devices we have with NMEA 0183.
Now we go with the SeaTalk, well very simple: If you have opted for the easy way, which is the one that I used at the beginning, because the SeaTalk to USB adapter of 35 euros, you connect it and the steps are identical than with the NMEA, only change the connection speed, which in this case is 38400.
If we opt for the even cheaper option of the optocoupler, also very simple:
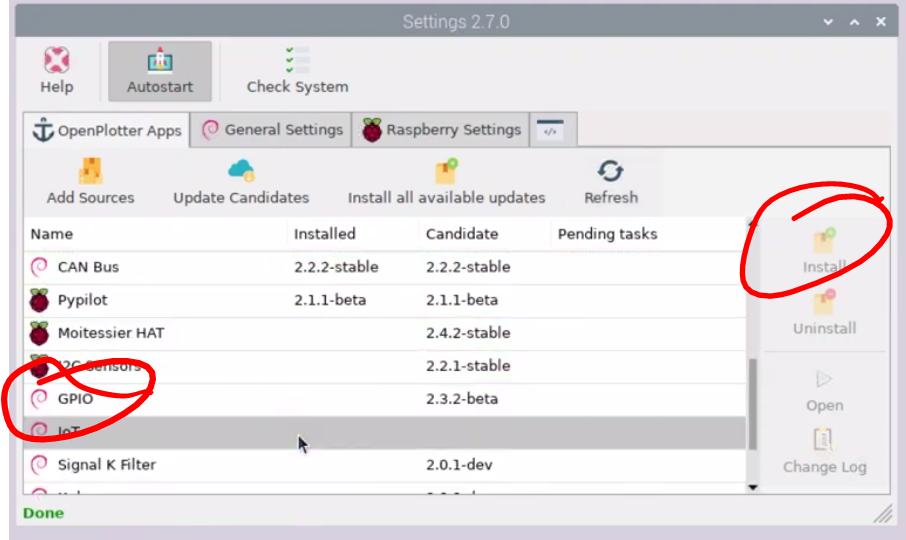
We will install the GPIO option on the Raspberry Pi
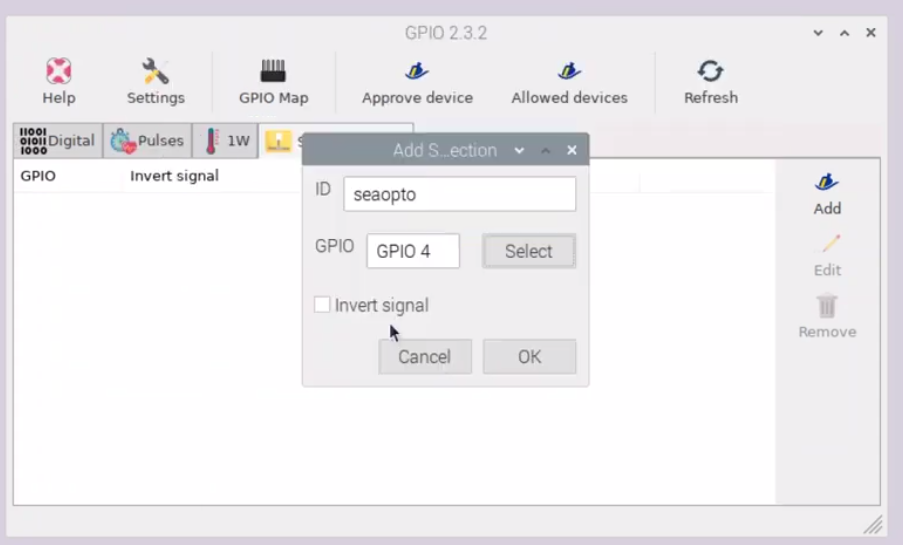
We will enter the GPIO application in the Raspberry menu
We will see a Seatalk 1 tab where we will add a new device, we will give it a name, we will assign it to pin 4 and we will say to invert the signal.
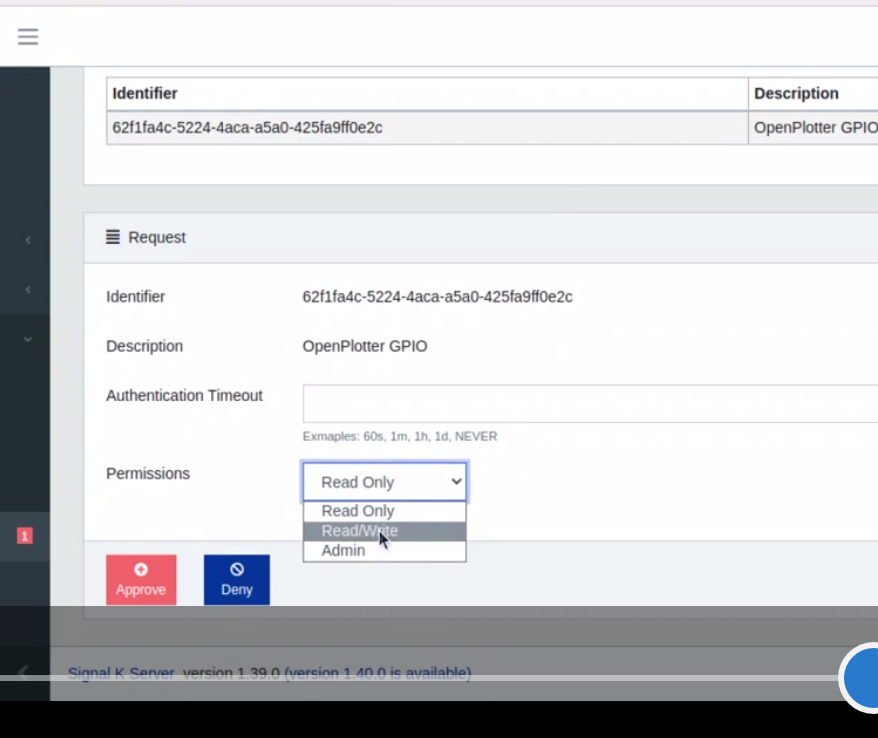
We will approve the device in the SignalK, which will force us to log in (the username and password will be admin if you have never changed them)
We will give you read and write permissions, and we already have the devices working ..
Testing everything
And now we can see the data from multiple sites, actually, thanks to the remote connection, from anywhere …
But basically:
From the status of the K signal, opening it in the Raspberry or in any browser, in my case http://192.168.10.60:3000, in your case the IP address will change but not the port.
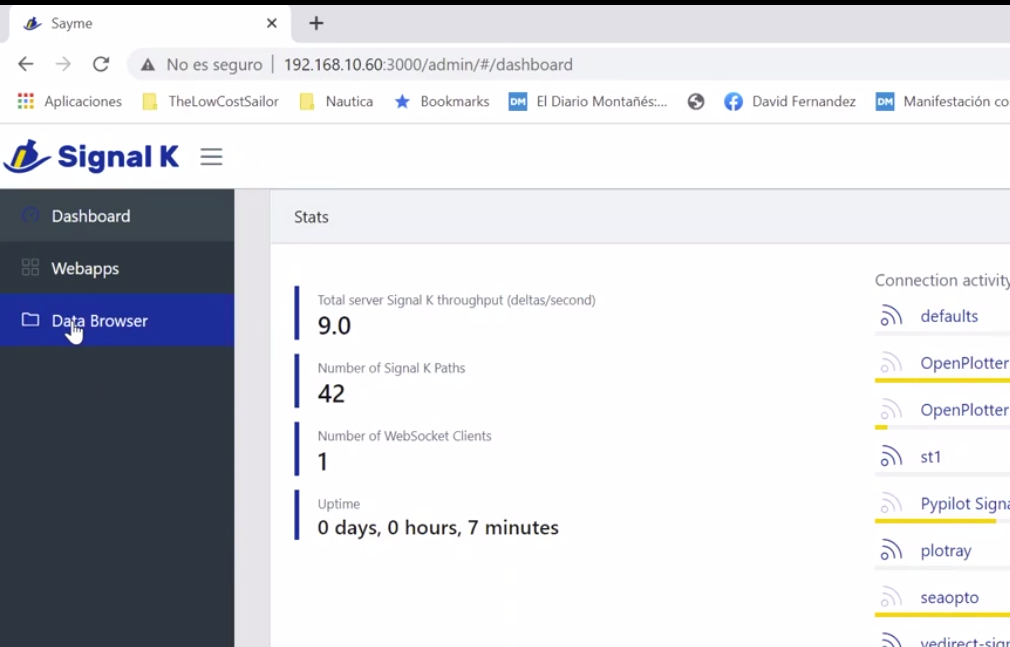
In the data browser option you will be able to see all the data it receives, but also the K signal itself allows us to make our own clock screens with the data.
And of course, we can see everything we want from our usual navigation applications, either by opening them on the Raspberry itself, or on any mobile, computer or tablet connected to the ship’s Wi-Fi.
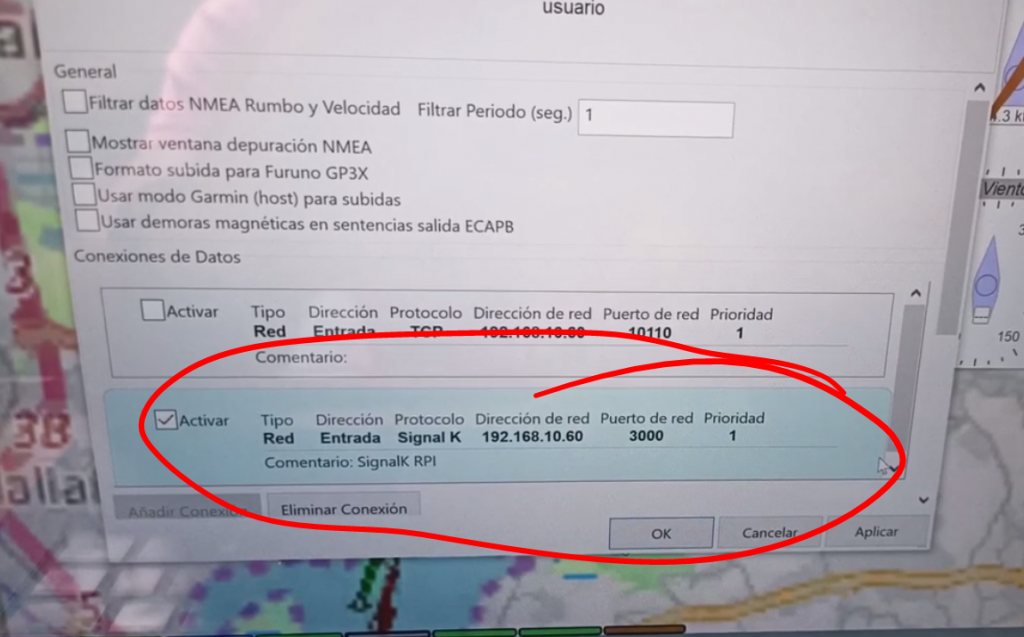
With OpenCPN, very easy: We add a new data connection, we put the IP address of the signalK server of our Raspberry (in the network option the Rapsberry shows us) and we already have the open CPN receiving the data .. we can see all the data that reach the Raspberry (both the AIS data from our episode 11, how useful they are), and the possibility of superimposing the indicators that we want on the screen.
All really useful to be able to navigate and use the RPI as a plotter or a tablet or mobile.
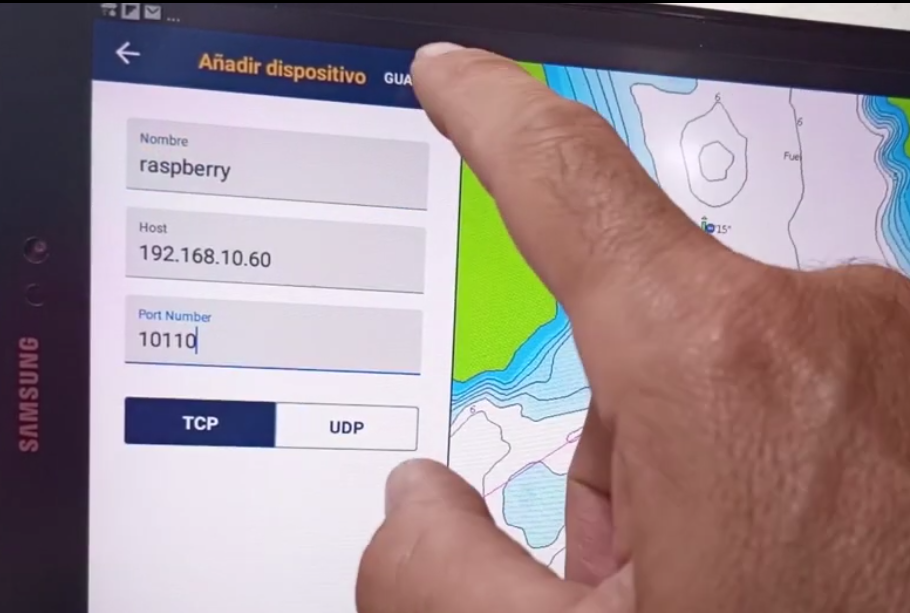
With Navionics we can also do it: We will add a new connected device, it will ask us for a name, the IP address and the port and if it is UDP or TCP, we will take all this from the same screen of the Raspberry, from the option signalK NMEA Output, usually the address of the Raspberry and port 10110. We fill in the data in Navionics and, if we have an active subscription, it already begins to show us the AIS ships and even, in the latest version, the depth of our sounder.