
How to get free WIFI on your boat
Greatings Sailors,
Today we are going to see all the steps necessary to install a WIFI network on our boat, how to give it free Internet when we are at the dock, and how to back up that Internet with another one for when we are sailing.
This post can also be applied to have free WIFI in your van, motorhome, or vacation house…
In all modern vessels, sometimes without our knowledge, there is some kind of communication network deployed. Normally a nautical network like NMEA or NME2000 or SeaTalk, that is in charge of connecting the different navigation devices and classic instrumentation of our boats; such as the plotter or the wind instrument, or the sounder, etc.
These networks designed specifically for nautical purposes have their advantages and disadvantages. The main one, without a doubt, is that they are expensive, very expensive, from the wires to the connectors or the HUBs, etc. And that’s not to mention the devices and electronics that use them.
Today what we are going to do is deploy another type of communication network, one with which we are very familiar and that we use regularly in our homes, today we are going to install a WIFI network for our boat.
And Why to install a WiFi network in our boat? you will wonder… Well, having a WIFI network on our boat is going to open a lot of possibilities and functionalities for devices that are very economic, and we will be able to incorporate them into our boat. Improving and even replacing some very expensive nautical devices. But expecially, allowing us to incorporate some very practical functions that we did not imagine yet.
Some examples of devices that I have already deployed in my boat are:
Internet connection for our navigation computer, Raspberry PI with AIS system, GPS, navigation tablet, masthead camera, front camera, interior surveillance camera, bilge water detector, internal temperature sensor, boiler controller (for boat hot water), remote control of our switchs panel, fridge temperature sensor, wifi controlled plugs (for heating), etc.
In short, a lot of things that will allow us to have a “connected” boat.
Shopping
So, we are going to start buying what we will need:
First and foremost, a WIFI router. Does not have to be especially powerful, nor especially expensive. Ideally, it will work at 12V or it will be powered by USB so that we can use it both: in port and while sailing…
In my case I took this:
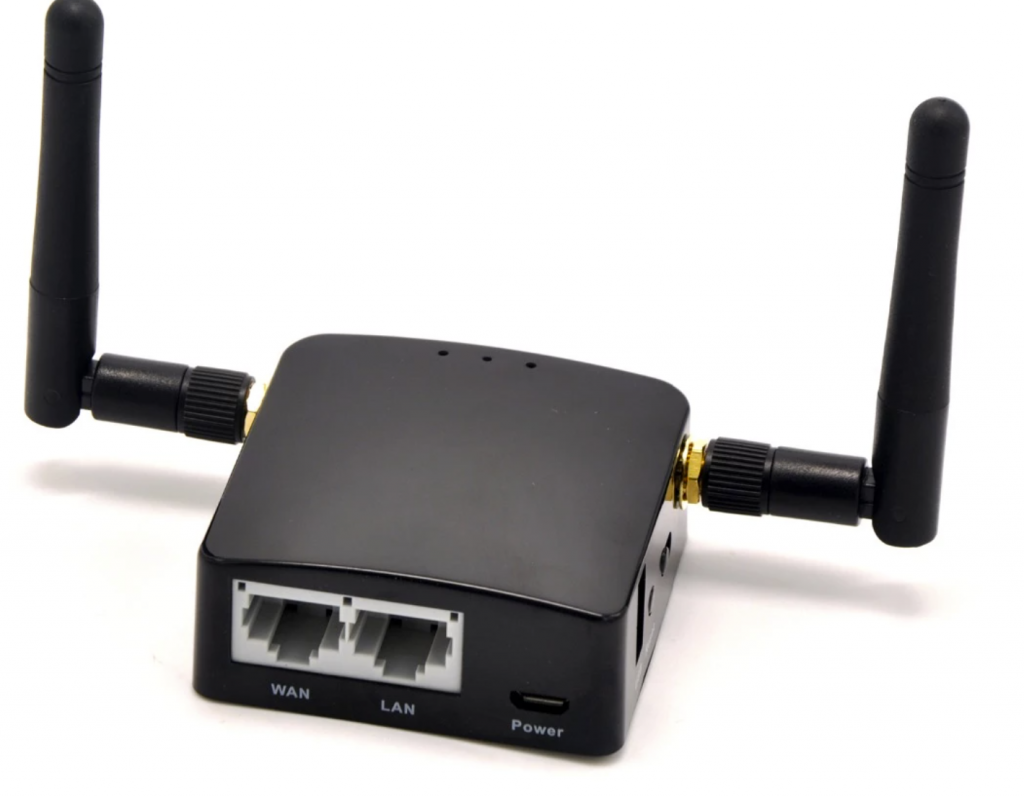
You have it available here at Amazon or at Aliexpress https://s.click.aliexpress.com/e/_DePFd63
Its advantages: it is cheap, very small, has two ethernet ports that can be used to connect other devices or to connect to a Wi-Fi bridge to have free internet at the dock, and it is powered by a USB cable, which will facilitate us how to power it on our boat. But we can actually use anyone that suits our needs.
Additionally we will need a power supply for it, in our case it will be a usb car charger. Any of 2 amps will serve us, I used the following one:
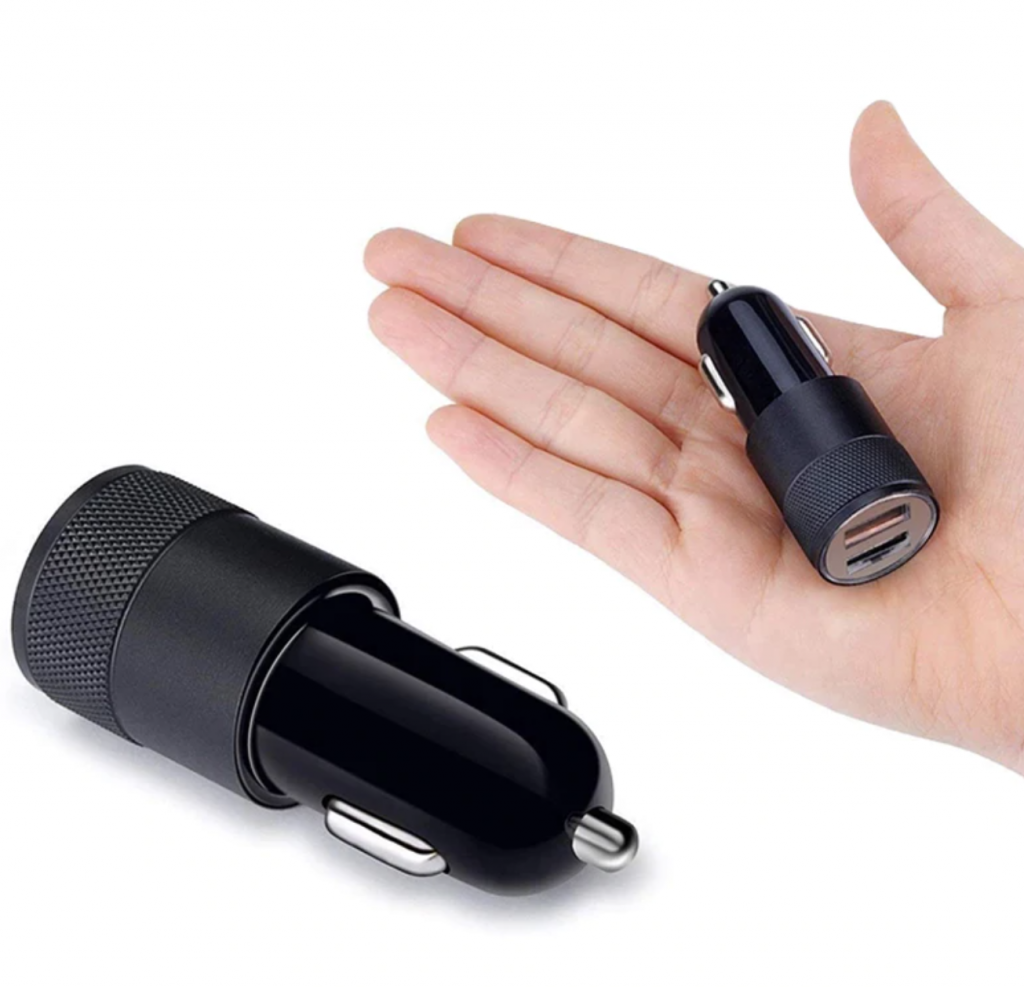
https://s.click.aliexpress.com/e/_DFPtPPd
And you have to be connected to a 12V outlet that you already have, or else, you can easily get settled some additional ones… I bought a lot of lighter connectors and now I have outlets installed all over the boat… My recommendation is to do the same.
https://s.click.aliexpress.com/e/_A5yxkF
It will be good also to put a switch to allow you to disconnect it easily.
https://s.click.aliexpress.com/e/_A1SMe7
With this, you already have everything you need to mount the wifi on your boat. But if in your port there is nearby free wifi, or any WIFI provided by the port or from a generous neighbor who has left you its password, then you can put an external antenna to give your wifi internet access without having to pay for internet connections.
Then my recomendation is something like this:
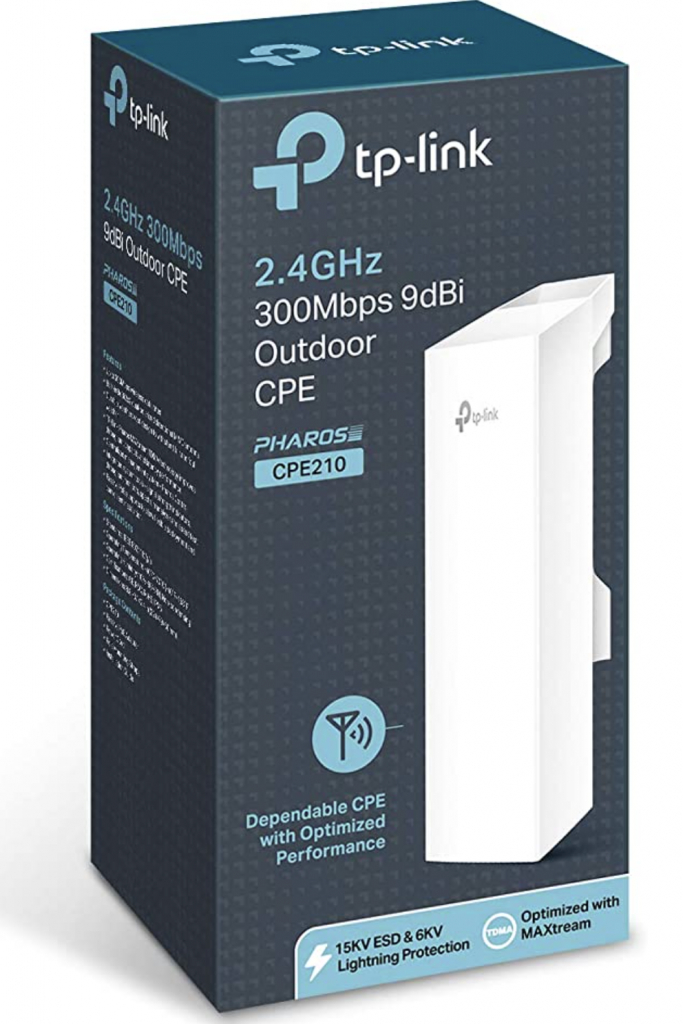
You have it available here at Amazon for less than $40..
Finally, if you do not have Wi-Fi at hand in the port or you want to also have your devices connected to the internet while you sail, the ideal thing is to add a 3g, 4g, or 5g USB dongle in the style of this to the shopping list, especially now that there are many very cheap data flat rates…
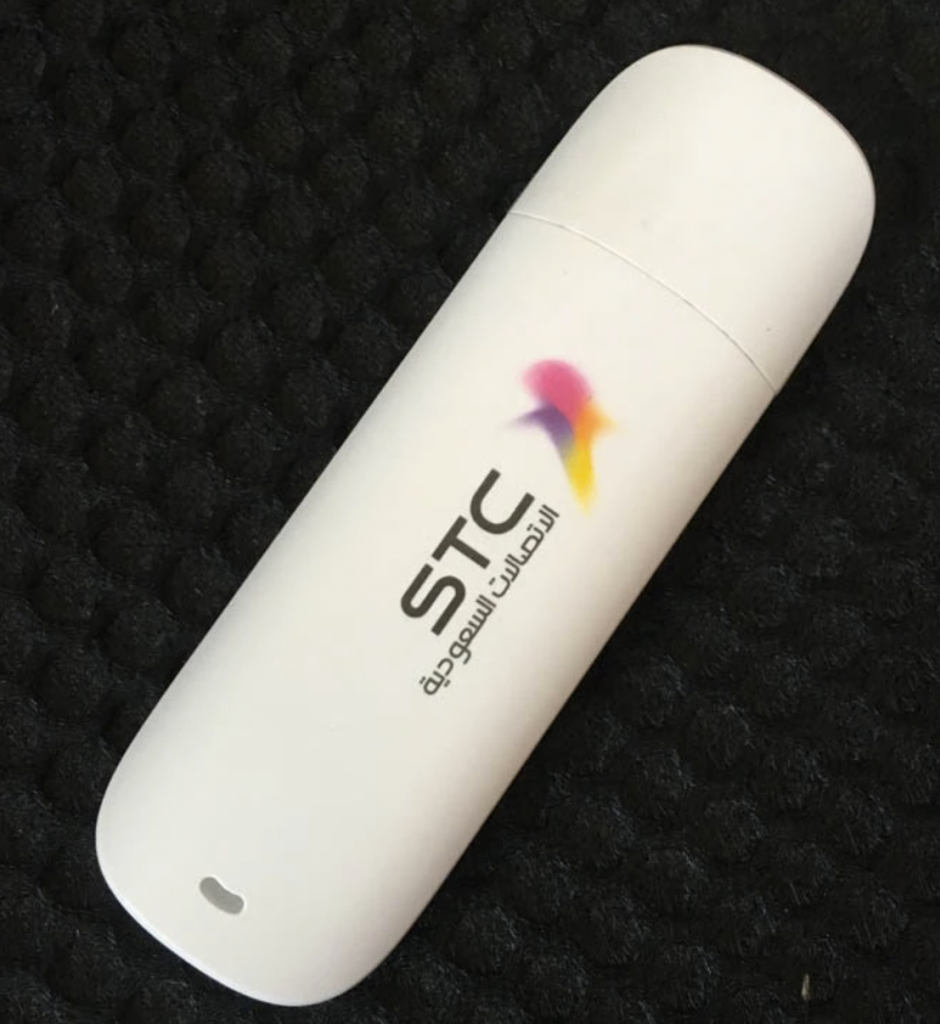
https://s.click.aliexpress.com/e/_DFMETB9 https://amzn.to/3UBB9Uv
But almost any 3g/4g modem with PDP v6 compatibility or with compatibility with OpenWRT will work.
Or a wifi version like this, using the mini router as a repeater https://s.click.aliexpress.com/e/_Dlgz4oT or at Amazon https://amzn.to/3ycGcmN
Installation
And now is time to put everything together.
First, we look for a suitable place to put the router you so it will have easy access to the battery power, the ideal place is next to the breaker panel.
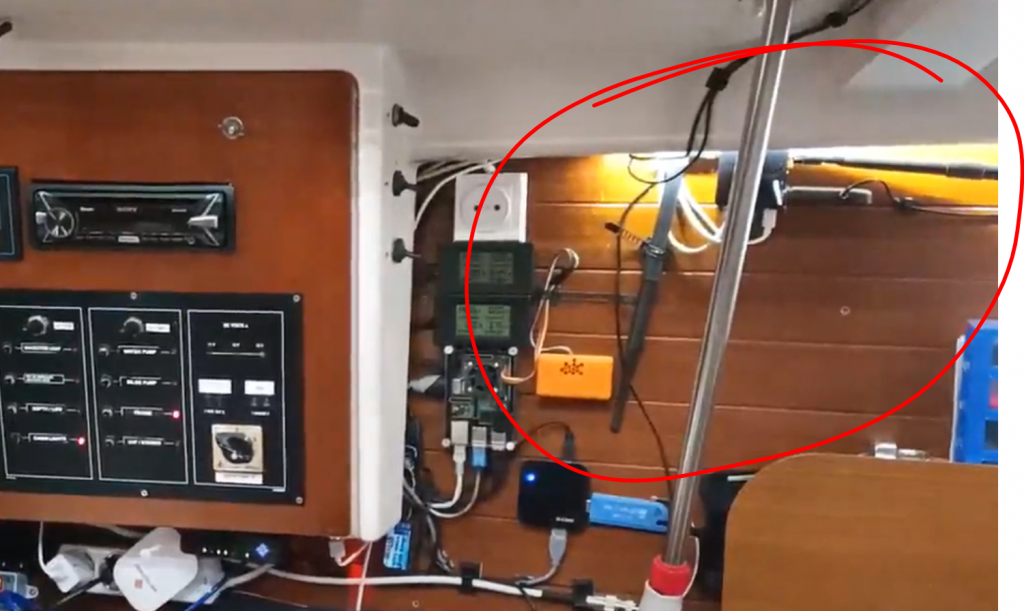
We will connect our cigarette lighter outlet to the boat’s battery, we will add a switch to easily disconnect it and then we connect the power cable to the USB charger that we have plugged into the cigarette lighter outlet… And voila, we already have our router working.
Now it’s time to configure it. Basically it will consist on connecting to it with a computer via the wifi that it mounts by default and what we will do is assign it a new SSID (the name of our wifi network) and put a password on it. Remember that our WIFI will be as safe as its password is.
With this we already have our WIFI network ready to be used, in future posts, we will see how to connect different devices, but for now, we are going to make it more useful by giving it an internet connection, for this we are going to see two options:
Connect in port through a WIFI bridge antenna
In the same way, we are going to install our external antenna in some part of the exterior of our boat, or even in the interior if we have any wifi really close.
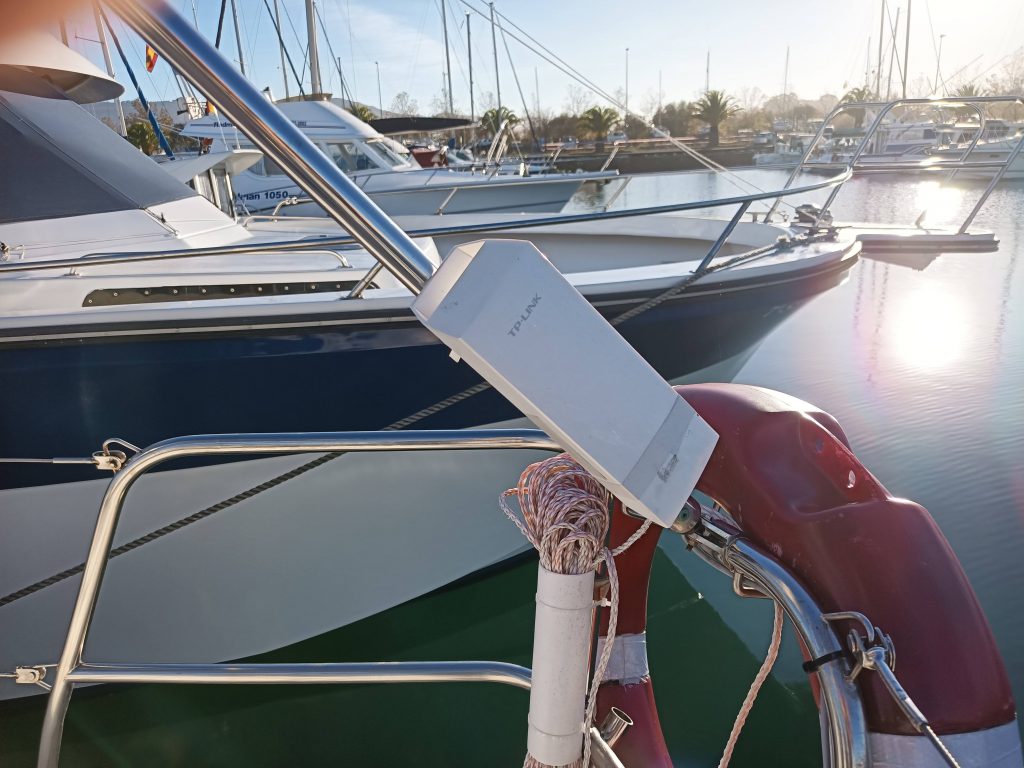
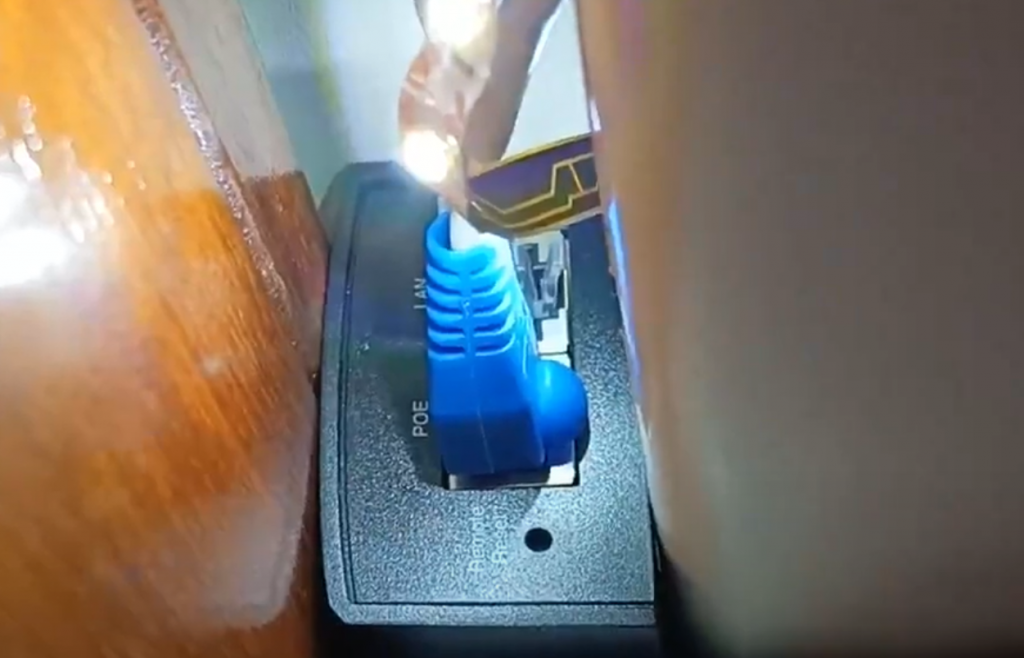
We will use UTP network cable to connect the antenna to its POE power supply, in my case the latter is connected to one of the boat’s AC sockets, which have electricity while the boat is connected to the shore power.
Taking into account that the dock is where we will be able to connecto to a shared WIFI, it perfectly fulfills its function. Thus, when I plug the boat into the dock’s electricity, the WIFI antenna automatically turns on and when I sail it turns off.
Finally, from the POE power supply we will run another cable to one of the network connectors of our WIFI router, normally the one indicated in the manual as WAN. At that point we will see that in the configuration of our WIFI the antenna will already appear as connected.
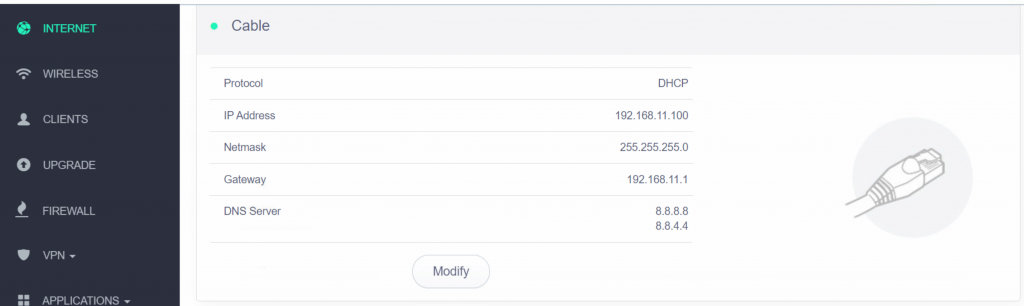
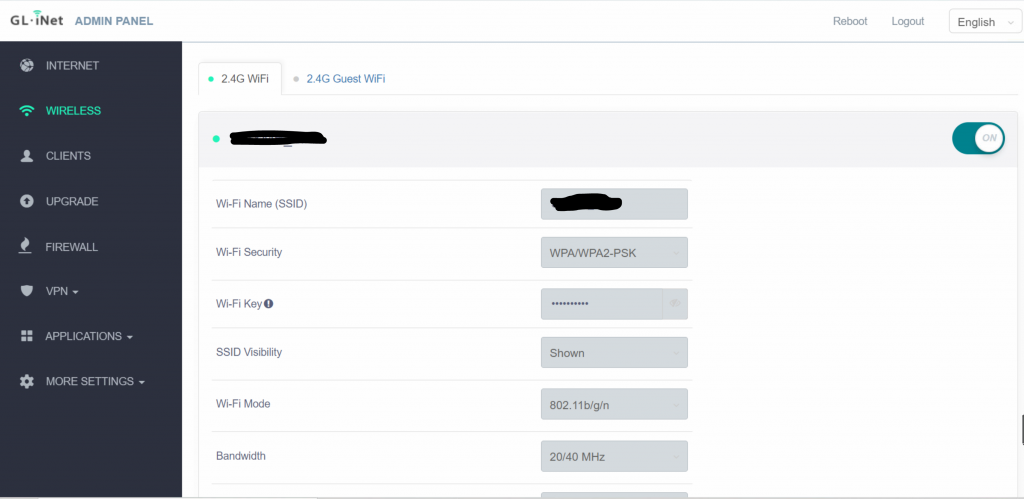
Simply, connected to the WIFI network, we are going to first configure the external antenna by opening the address that appears in “Gateway” in the browser.
My first recommendation is to go to the Network section and change the default IP of the router’s network, the idea is that it does not coincide with the one we are going to connect to, so it will be good to avoid 192.168.10.1, 192.168.100.1 and 192.168.1.1 which are very popular .. in our case we have chosen 192.168.11.1
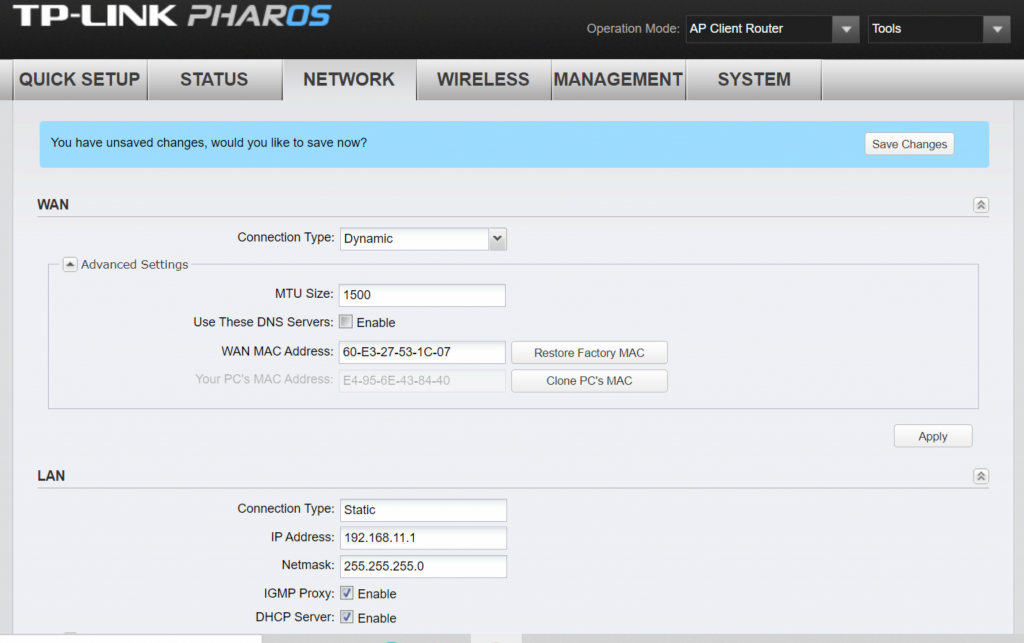
After that we select quick setup and choose AP Client Router

And we will follow the steps of the wizard, usually choosing to take a dynamic IP address from the network to connect to
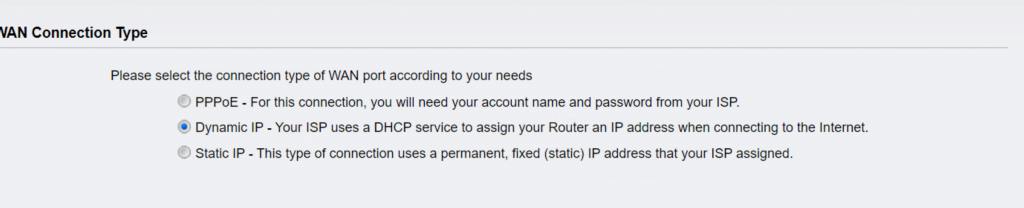
And finally the connection data of the WIFI to which we are going to connect (either the marina, a friend’s, or from a bar next door)
You have multiple options in this regard: That your port has a guest WIFI network to which you can connect, that near your berth there is a bar or similar with a WIFI network where you can ask for the password, that you have a friend or neighbor who lives near that you give your password, follow a tutorial on how to crack wifi networks https://www.youtube.com/watch?v=knllpZF508k or apply the idea that we propose in our header video.
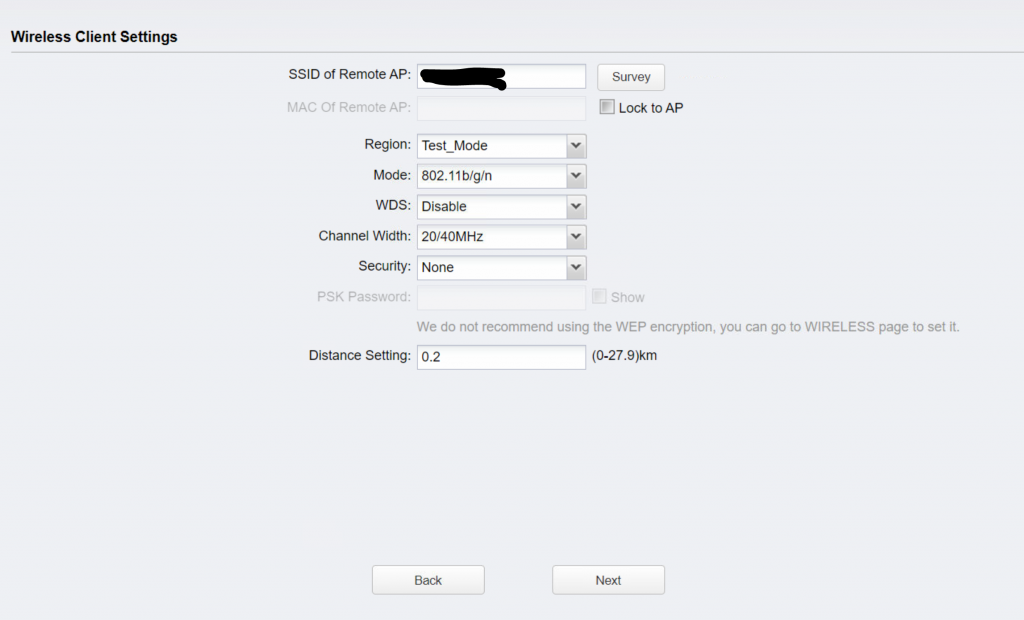
We finish the wizard, apply the changes and with that, we should already have free WIFI while we are at the dock.
Connecting throught 3G dongle
The next thing we are going to do is connect the 3G dongle that we have bought to our router and configure it so that we not only have an internet connection at the dock but also when we are sailing.
This is very simple: we put the SIM card of our preferred operator in the USB dongle, we plug it into the USB port of our router and we would only have to configure it to use it as an internet connection with the appropriate parameters.
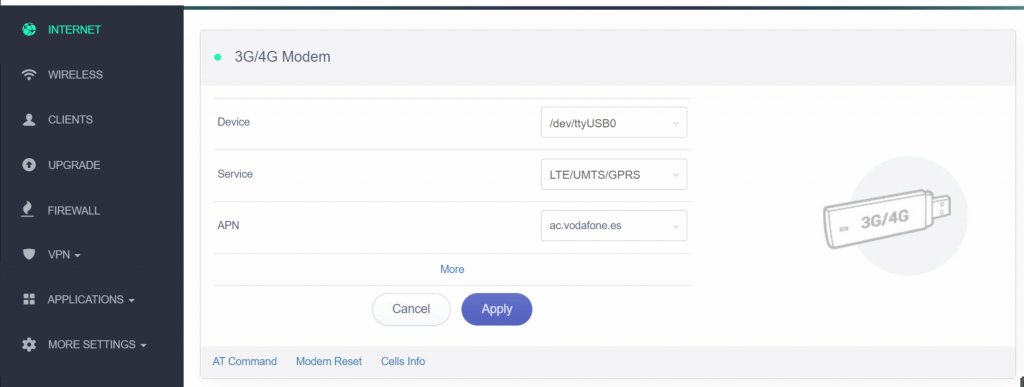
With this, we would already have configured the 3G dongle as the internet source for our WIFI.
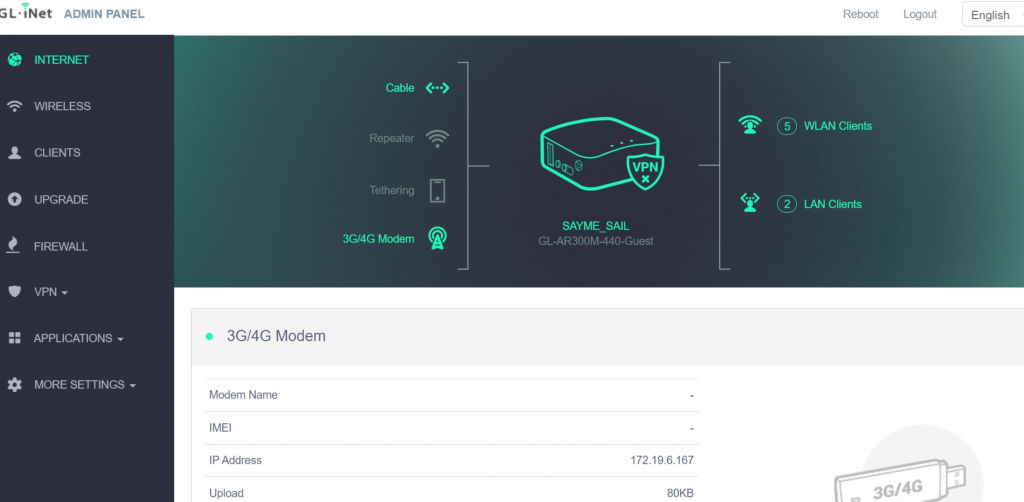
In my case, I have both configurations, so that if it is at the dock, it will preferably use the connection provided by the WIFI bridge, and when we are sailing it will use the 3G connection (or if the dock connection fails). So we save data when we are at the dock but we always have a connection.
Maybe one day I will write a post about what can be the best internet data connection that you can put on your boat, in my case I have a cheap data rate with a couple of Gb and that slows down when you go over, more than enough to keep the boat’s sensors always connected.
If you have any questions about the process, do not hesitate to watch the attached video or consult us through our social networks.
Conclusions
I have had Wi-Fi installed on the boat for three years, and the truth is that the number of things and services it offers me is priceless. I sleep much more peacefully knowing that if water enters the bilge I will receive a notification on my mobile, or if my refrigerator freezes or thaws I will be able to know … or being able to use the cameras from home to monitor that everything is correct on the boat when there is a storm.
Without a doubt, it seems to be a fundamental aspect to have your boat connected and I am sure that just as I am delighted, you will be too.