
Low cost chart plotter with Raspberry Pi and Open Plotter
Greetings sailors,
Today we are going to see how to install the famous Raspberry Pi with Open Plotter on our boat. Basically we are going to put a brain to our boat.
With the Raspberry Pi we will be able to do a multitude of things that could fill many posts, but today we are going to focus on doing two things with it: We are going to build a very advanced and super economical chart plotter for our boat, and we are also going to add to that plotter an AIS system to see the boats around us. And, the latter will be with a simple USB TV tuner.
Some basics
Some of you may have already heard of the raspberry pi, or the open plotter .. For others they will be somewhat hidden terms .. and you will not be very clear about what I am talking about.
Let’s start with the Raspberry Pi: because the Raspberry Pi is basically a very small computer, very cheap, and not for that little powerful. For example, the Raspberry Pi 3, which we are going to use, costs 35 euros.
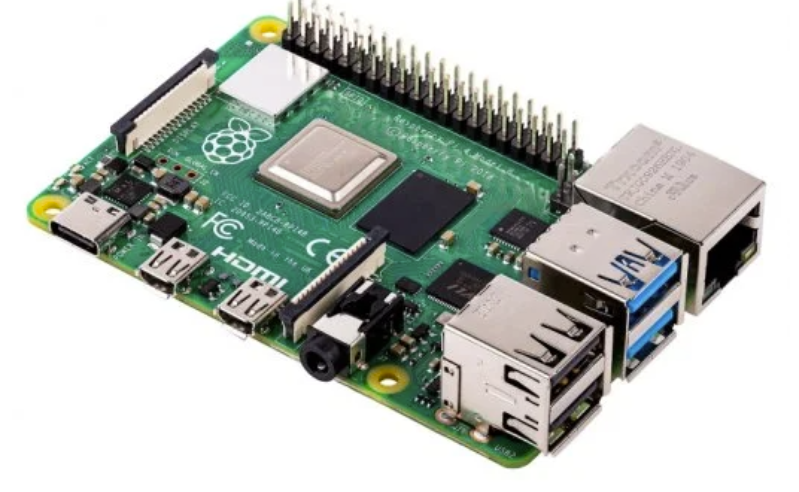
As it is such a cheap computer, a multitude of projects have arisen to do all kinds of things with it: from turning it into a smart TV, or becoming a retro console like those in arcades, or even, as in our case, that one fine day someone thought that it would be a good complement to install on a boat ..
And from there came the other great term of our basic concepts: Open Plotter.
Open plotter is nothing more than a Linux-based operating system and designed specifically to run on the Raspberry Pi and that unites a lot of super useful utilities and programs for surfers.
What is it going to do for us?
With the Raspberry Pi, Open plotter and some additional accessories we will be able to do a lot of things:
The first thing is that by plugging in a USB GPS we will be able to use it as a chart plotter for our boat.
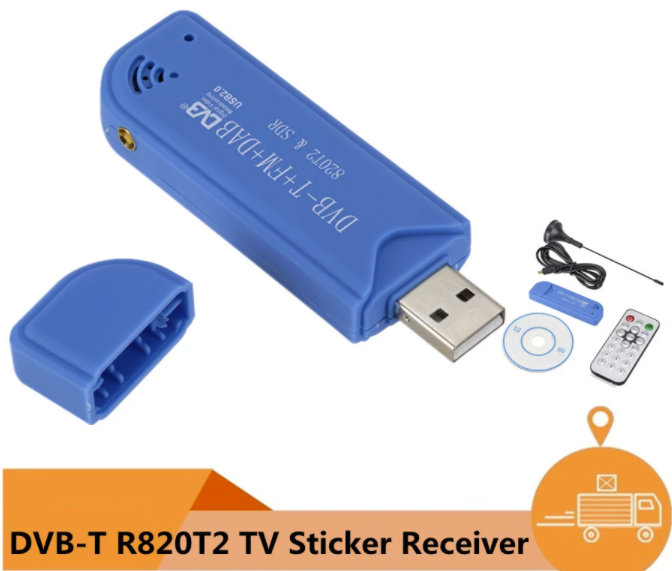
But it is going to be a very versatile chart plotter, much more than other very expensive big brands, because, for example, with a 12-euro television tuner we will be able to convert it into an AIS receiver to see big ships, that surround us, in real time, with their courses and speeds.
And there is not the thing, because we can download the meteorological information, with its forecasts, and superimpose it on the maps of our plotter, or connect the rest of the instruments that we already have on the boat, such as the sounder or the wind equipment and see all that unified information on your screen (the screen that you choose) or better yet .. through WiFi we will have all that data available on our tablet or mobile. He is even capable of acting as a WiFi access point.
Not to mention the fact that we can also use it to view our cameras on a TV or screen.
But today we are going to start with the simple, with the first steps.
Mounting options
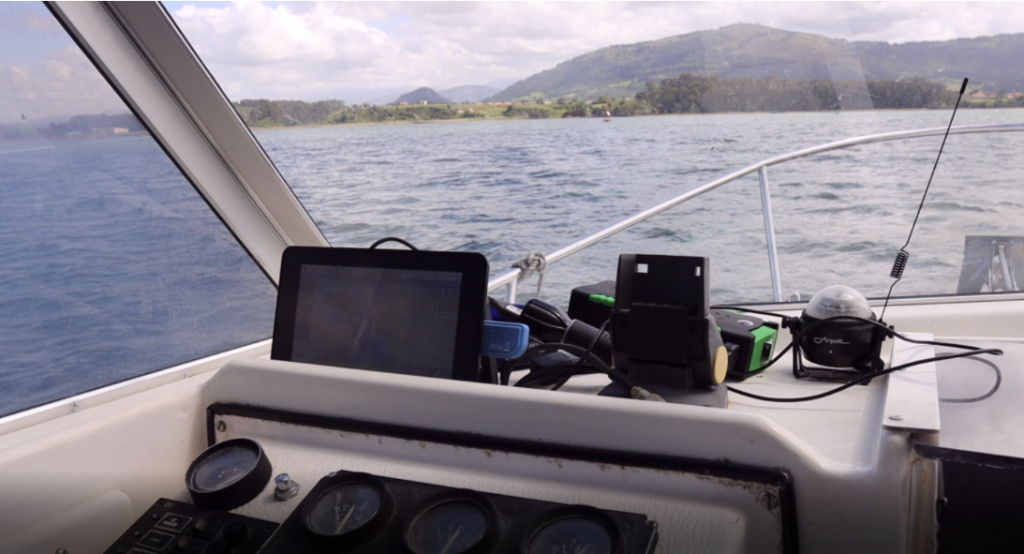
To build our plotter with AIS we are going to see two mounting options: As a system without a screen or connected to the boat’s TV (as I have it in mine) or a self-contained option, an all-in-one, with a built-in touch screen. .
Shopping
Let’s see what we will need for each of the options, both to do it with the RPi 3 or with the RPi4. We are going to make a fairly complete list:
- For both options:
- RPI 3
Aliexpress: https://s.click.aliexpress.com/e/_ASklUn
Amazon: https://amzn.to/3bHzrve
o
RPI 4
Aliexpress: https://s.click.aliexpress.com/e/_AZ3l0d
Amazon: https://amzn.to/3fx6HX6 - Micro SD memory card 32 Gb
Aliexpress: https://s.click.aliexpress.com/e/_997Eal
Amazon: https://amzn.to/3bHzrve - USB TV tuner:
My favorite
Aliexpress: https://s.click.aliexpress.com/e/_9wtWoh
Amazon: https://amzn.to/3oC7qKB
o
The best fit if you are going to use a VHF antenna.
Aliexpress: https://s.click.aliexpress.com/e/_9iQE3f
Amazon: https://amzn.to/2S6M6Rr
- RPI 3
- 12V power supply socket
Aliexpress: https://s.click.aliexpress.com/e/_9vmV9X
Amazon: https://amzn.to/3wp1vvs- USB 5V 2A charger
Aliexpress: https://s.click.aliexpress.com/e/_AFzyKl
Amazon: https://amzn.to/3u7KKDp - Power supply cable
Micro USB (RPI3)
Aliexpress: https://s.click.aliexpress.com/e/_AtiifJ
Amazon: https://amzn.to/3u5Y0Z9
o
USB C (RPI4)
Aliexpress: https://amzn.to/2QkxZHA
Amazon: https://amzn.to/3f5tOJt
- USB 5V 2A charger
- For the option without screen or connected to a TV screen
- GPS USB
Aliexpress: https://s.click.aliexpress.com/e/_ACtU7P
Amazon: https://amzn.to/3u0oFGI - HDMI cable
Aliexpress: https://s.click.aliexpress.com/e/_ATJXcd
Amazon: https://amzn.to/3oCcXAR - Micro HDMI Adapter(Only for RPi 4)
Aliexpress: https://s.click.aliexpress.com/e/_AAlaZ3
Amazon: https://amzn.to/3f2kJ46 - Mini keyboard with touchpad
Aliexpress: https://s.click.aliexpress.com/e/_ANJaBR
Amazon: https://amzn.to/3f7Vyx8 - Raspberry Pi case
For RPi3
Aliexpress: https://s.click.aliexpress.com/e/_9wl1bF or with a small touch screen https://s.click.aliexpress.com/e/_9y5pWh
Amazon: https://amzn.to/3yrCVM7 or with a small touch screen https://amzn.to/3f70bay
For RPi4
Aliexpress: https://s.click.aliexpress.com/e/_AUwW8h
Amazon: https://amzn.to/343XO1O
- GPS USB
- For the all-in-one option
- GPS USB with integrated antenna
Aliexpress: https://s.click.aliexpress.com/e/_AZf7ul
Amazon: https://amzn.to/3v8A0ps - Touch screen case
For RPi3
Aliexpress: https://s.click.aliexpress.com/e/_AYhjWv
Amazon: https://amzn.to/3oyHShH
For RPi4
Aliexpress: https://s.click.aliexpress.com/e/_9HXvhJ
Amazon: https://amzn.to/3wpQbii
- GPS USB with integrated antenna
Connections
Well, any of the two mounting options will be very simple and regardless of which of the two we use, the installation and commissioning will be identical:
If we choose my option, reusing a TV from the ship:
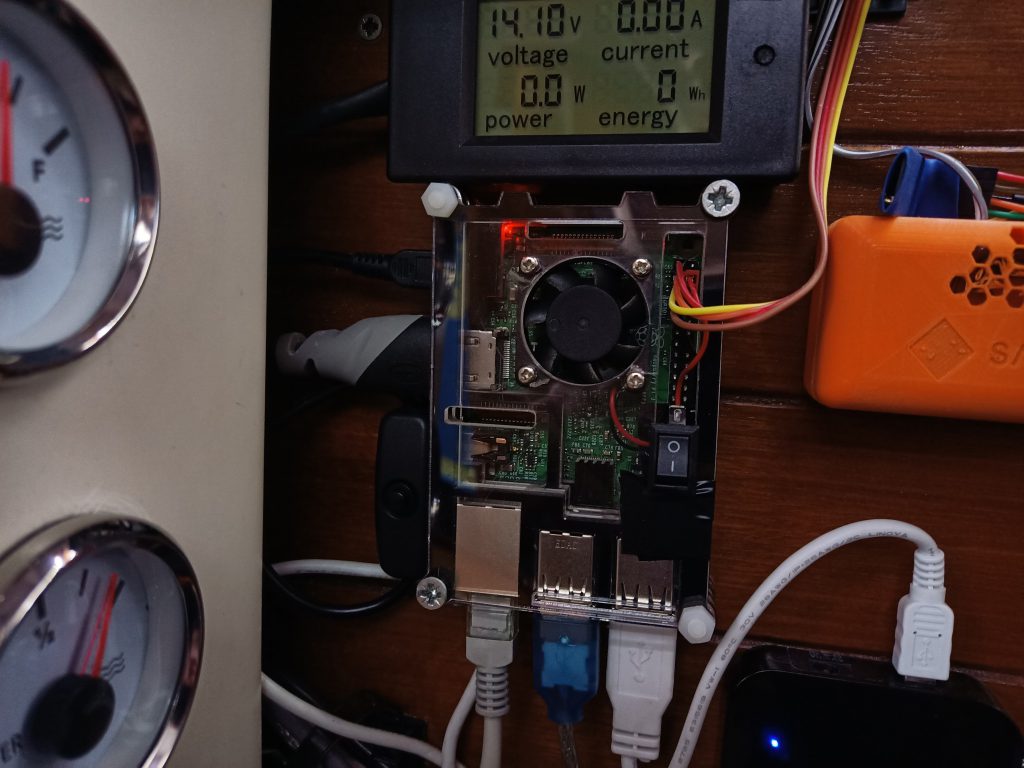
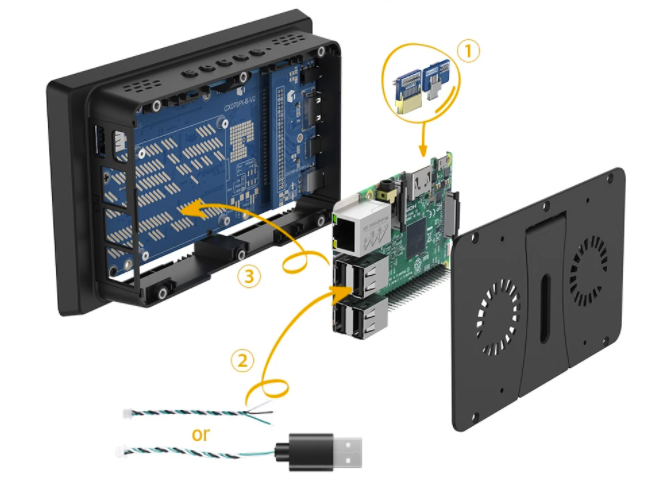
Well, very simple, we put our RPI in the box that we bought, we can add the heatsinks and even a fan that will be connected to pins 4 and 6.
Then, our USB GPS, simply to the USB port, our TV tuner, which will go to another of the USB ports and that for the moment we will use with the antenna that comes to us (it will always be better to use a large VHF antenna or connect it with a splitter or a selector to the station) and to the TV with the HDMI cable. To make everything easier, a mini USB keyboard with touchpad (any USB keyboard and / or mouse would do) and finally the power cable, which will go to a mobile charger that you have on the boat’s battery …
If we have opted for the other option all in one with touch screen
We will put the raspberry Pi in its box that includes a touch screen, we will internally connect the connectors for the screen .. And the rest of the connections .. then identical to the previous ones. GPS, TV tuner and power supply .. In this case the keyboard is optional, since we already have the touch screen .. although the installation process will be easier with a keyboard and mouse.
Start up
The first thing will be to record the Open Plotter on the 32Gb memory card, for this we insert it into a card reader on our computer or you can buy one on Aliexpress for one and a half euro.
We simply download the zip file with the open plotter from this link https://cloud.openmarine.net/s/sL9doDML7P4CQDo, if you have doubts there is a lot of information on the page https://openmarine.net/, and we save it in a folder on our computer.
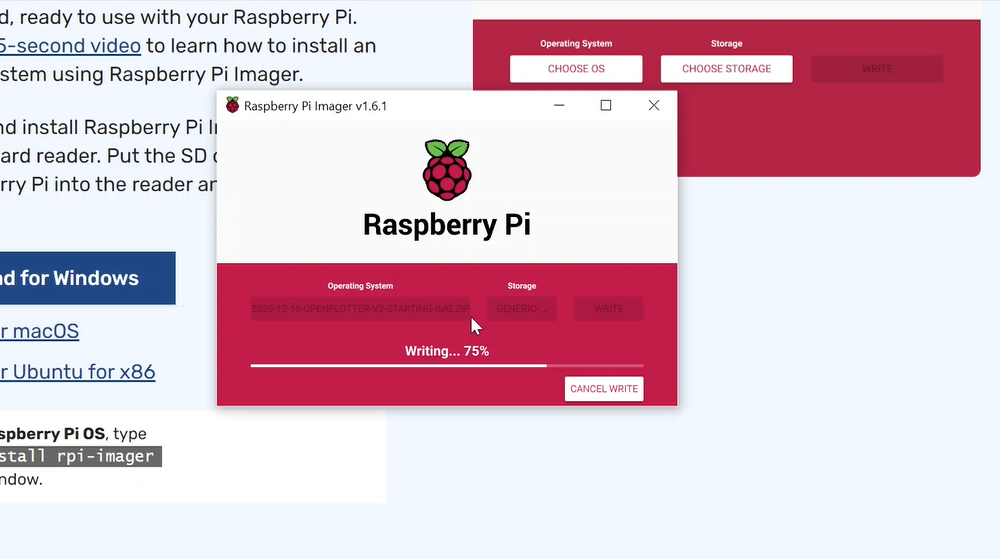
We download and install the Raspberry Pi Imager from this link https://www.raspberrypi.org/software/ and we will simply install and open it by choosing the custom option as Operating System and looking for the file that we have downloaded, then in storage the unit disk from our memory folder and simply click on write and wait for it to finish patiently. Remember that you have all the details in the video.
Setup
Now everything is a matter of putting the card in the Raspberry Pi and plugging it in, so that the whole configuration process begins.
The best thing is that you watch the video to see the whole process in detail, but it will basically consist of:
- Run the wizard to choose our country, time zone and language. At the same time, it will also allow us to choose a WiFi network with which we will connect to the internet, we can use the boat, house or share one with the mobile.
- Finish the wizard by letting it download all the updates.
- Connect the GPS to the USB and in the RPI menu to the OpenPlotter part and configure the GPS
- Download some charts from our navigation area: You can buy charts at https://www.o-charts.org/ or generate your own (we’ll see it another time) or search and download the famous CM93 charts.
- Copy the letters to the RPI and in the OpenCPN add this folder to the letter folders.
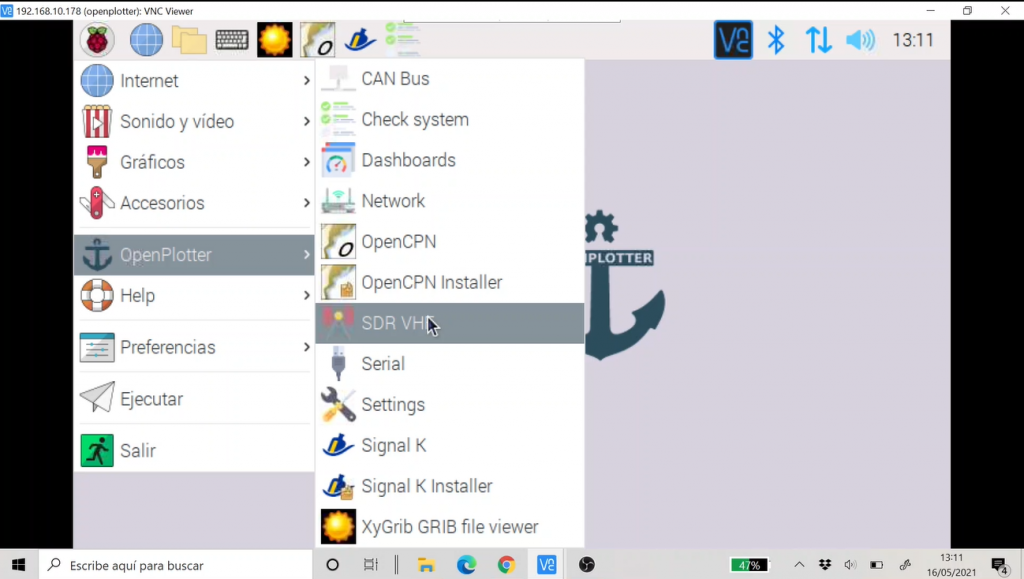
- Finally, connect the TV tuner
- Add the SDR VHF plugin to Open Plotter
- Calibrate our TV tuner in the newly installed application
- And activate the AIS within said application
As simple and as complicated as that, but I insist that the best thing is that you see it in the video at the head of this post.
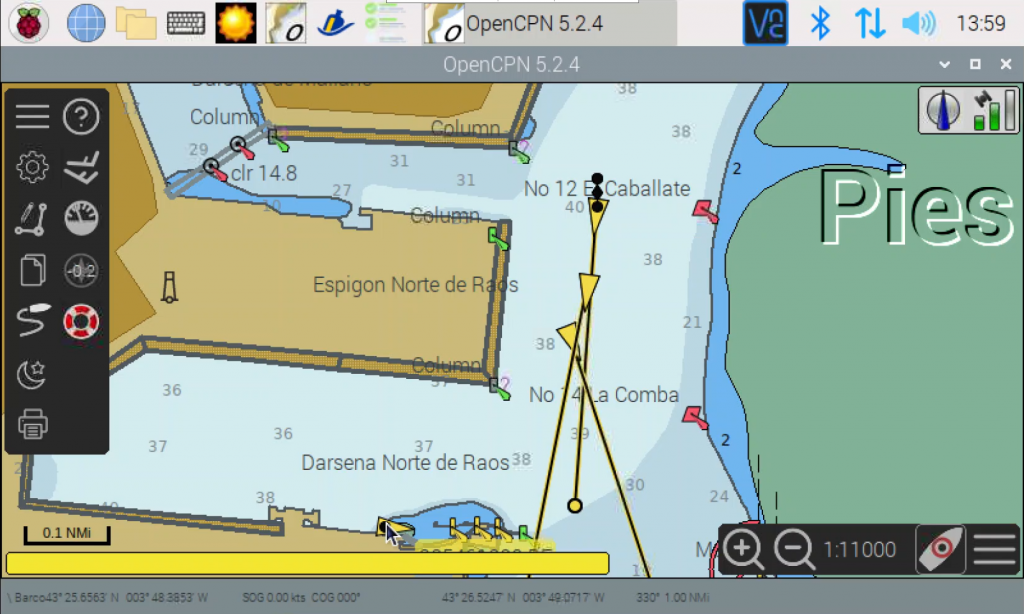
The first features
With this, opening the OpenCpn in the RPi we will be able to see our position on the maps and the ships that surround us.
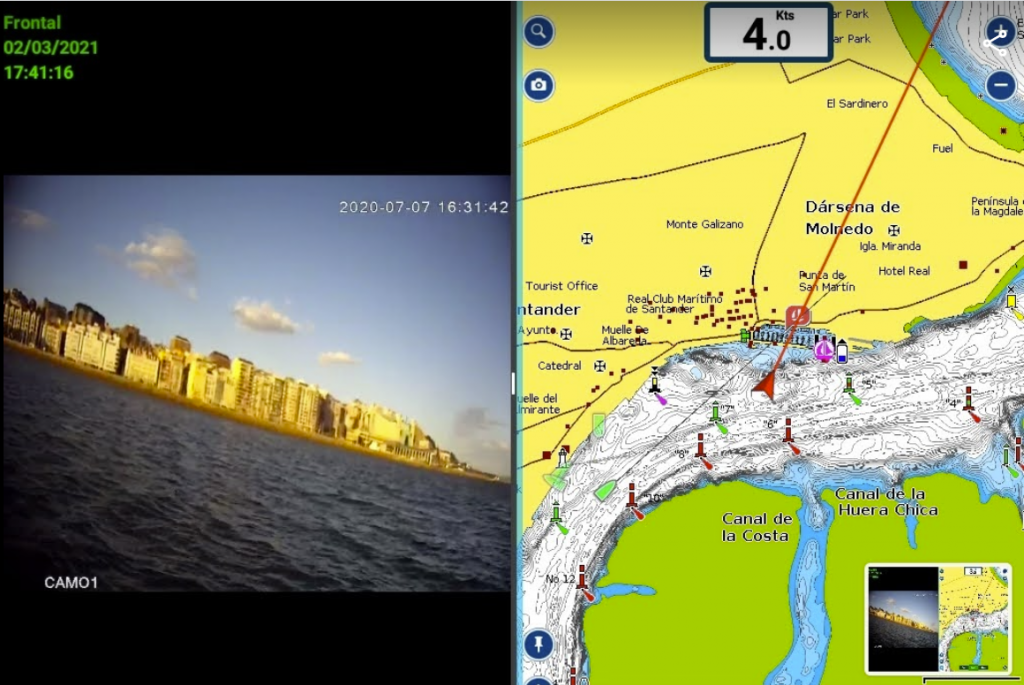
It will be relatively easy to see on any other device that you have connected to the same WiFi, but that will be the subject of future posts.
Know that if you get here, at least you already have all the pieces to connect it to your mobile or tablet and that the rest will be a matter of configuration without further ado …